Configuring Okta for SSO in Datapeople
In order to configure SSO, you will need to be both:
- Datapeople Administrator: You have access to the Datapeople SSO settings page in our app.
- Okta Administrator: You can create an Okta App and can update the SSO configuration page.
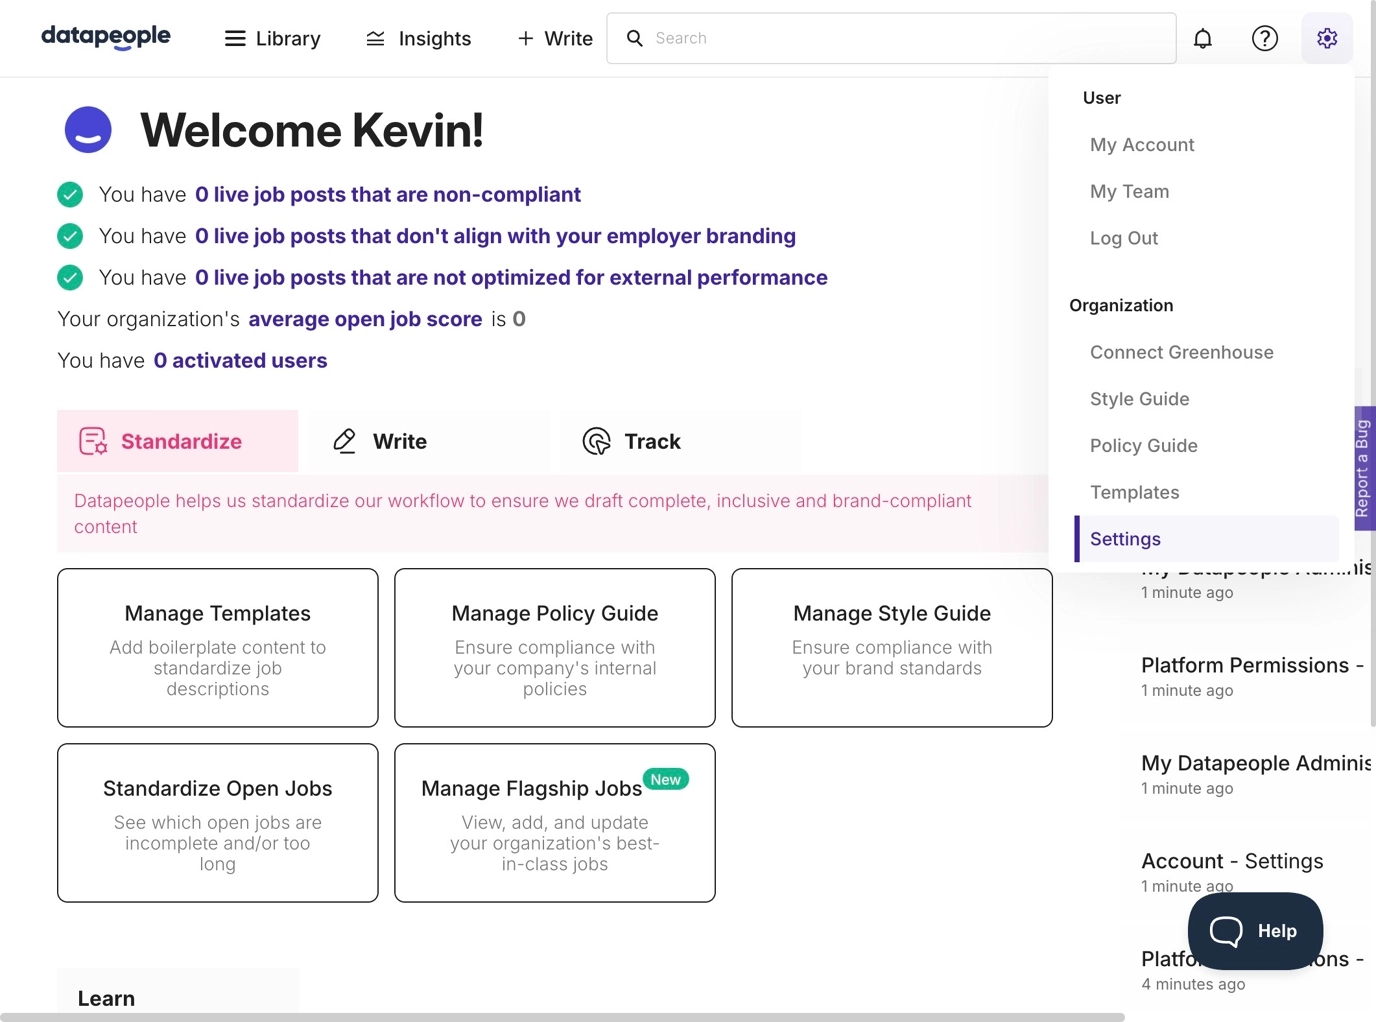
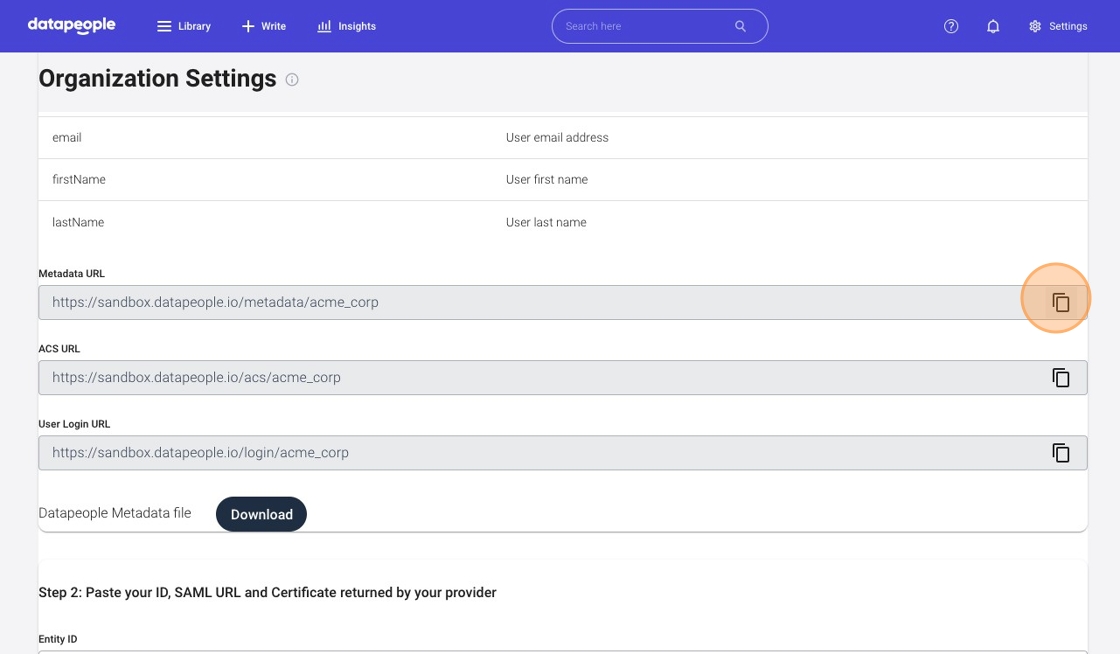
1. From the app home page, navigate to Settings.
2. Download the Datapeople Metadata file.

Set up Okta with Datapeople Metadata
Tip: In these next few steps, you'll be navigating back and forth between the Datapeople and Okta tabs
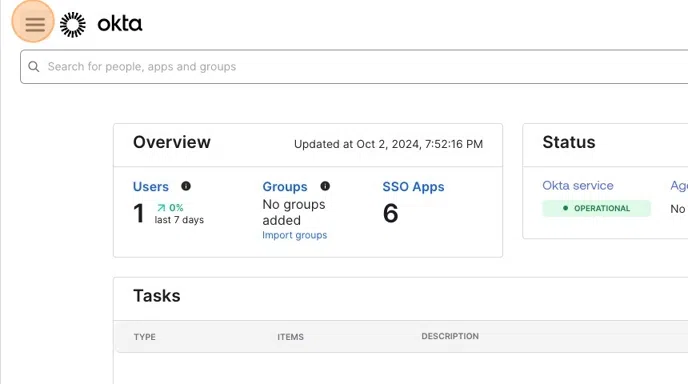
3. In another tab, log into Okta
In the left hand menu, navigate to Applications > Create App Integration
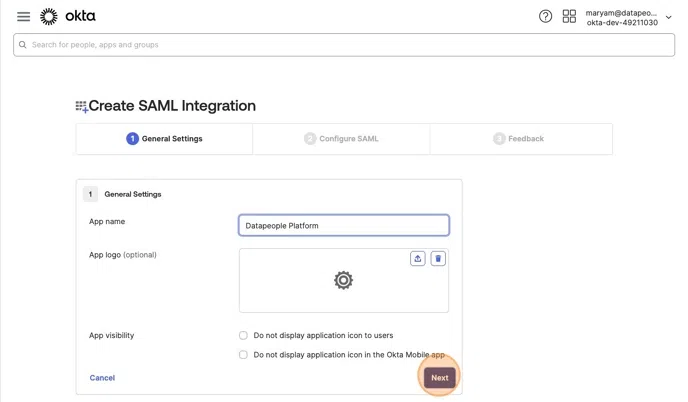
4. Select SAML 2.0. Give your app the name Datapeople Platform.
5. Copy the ACS URL from the Datapeople SSO Settings page into the Single Sign-on URL in the Okta page.
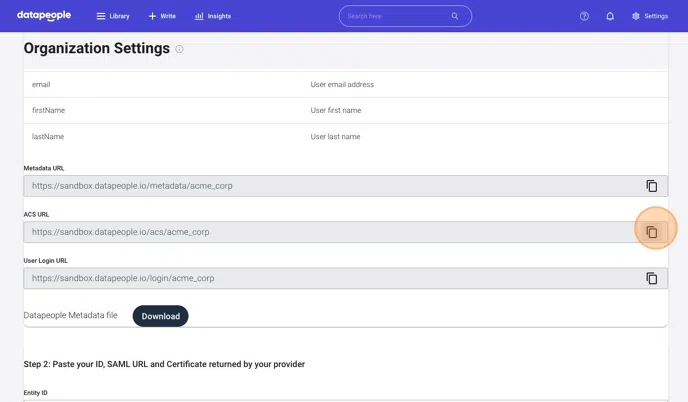
6. Copy the Metadata URL from the Datapeople SSO Settings page into the Audience URLI (SP Entity ID) in the Okta page.
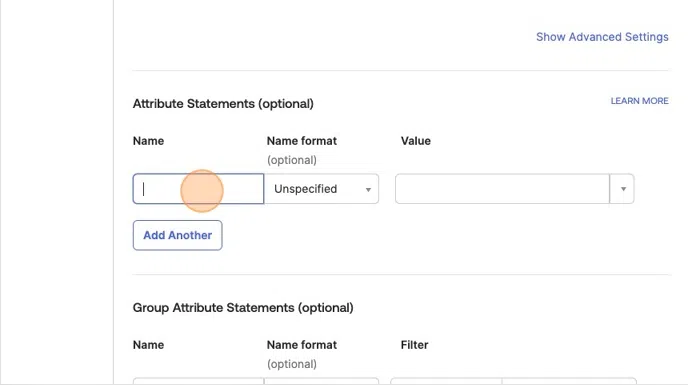
7. In the Okta tab, scroll down and update Attribute Statements.
- Type email in the Name field.
- Select user.email from the Value dropdown.
- Click the Add another button.
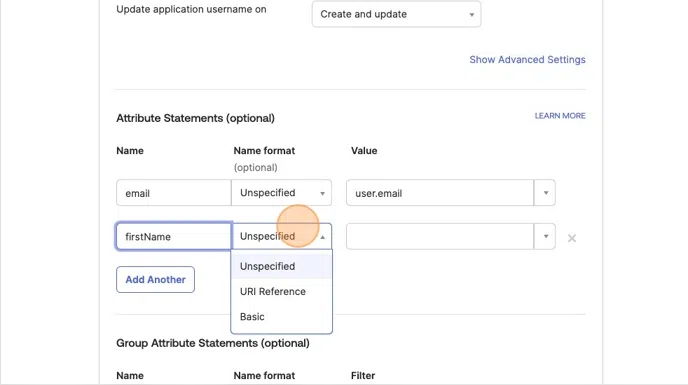
8. Type firstName in the Name field.
- Select Basic from the Name format dropdown.
- Select user.firstName from the Value dropdown.
- Click the Add another button.
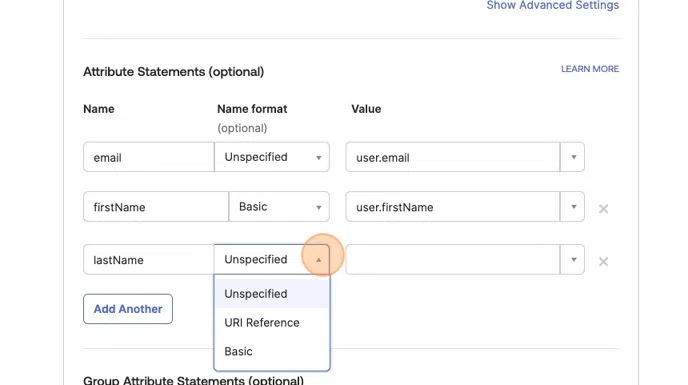
9. Type lastName in the Name field.
- Select Basic from the Name format dropdown.
- Select user.lastName from the Value dropdown.
Make sure to enable any necessary security / user groups to share access with Datapeople with the correct internal teams/users.
10. Scroll to the end of the page and click Next and then on the following page, click Finish.

Copy Okta metadata back to Datapeople
You now need to copy fields back from Okta to Datapeople. Steps 11-14 show these in step-by-step detail.
| Okta Field | Datapeople Field |
|---|---|
| Identity Provider Issuer | Entity ID |
| Identity Provider Single Sign-On URL | SAML Location URL |
| X.509 Certificate | Certificate |
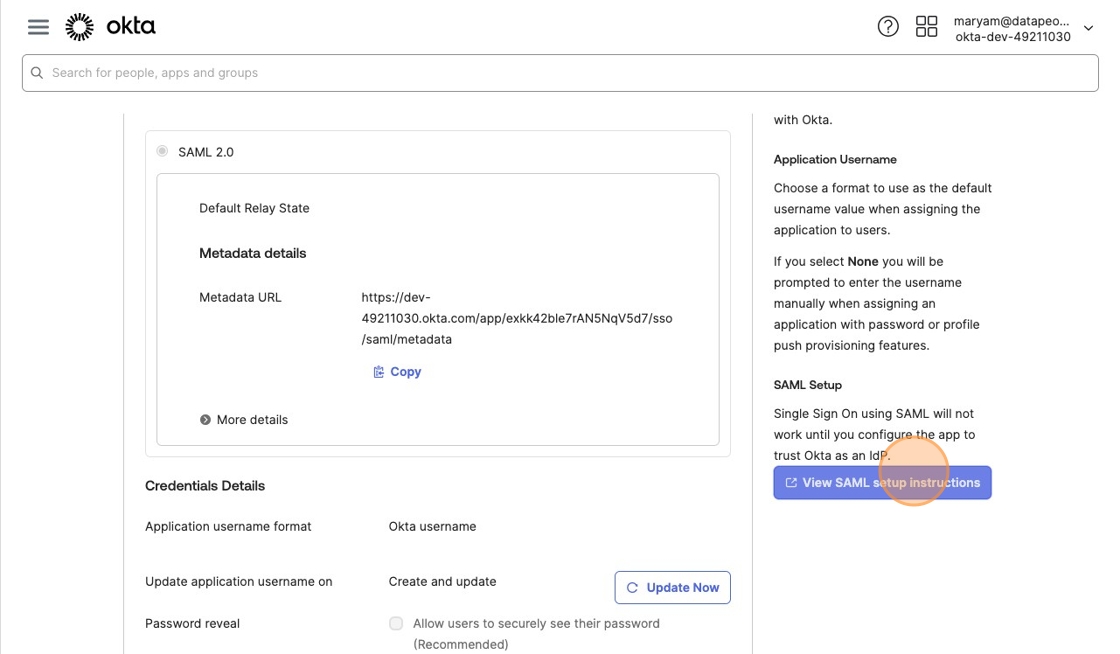
11. In the Okta tab, click View SAML setup instructions. This will open a new tab that the data you need to share with Datapeople.
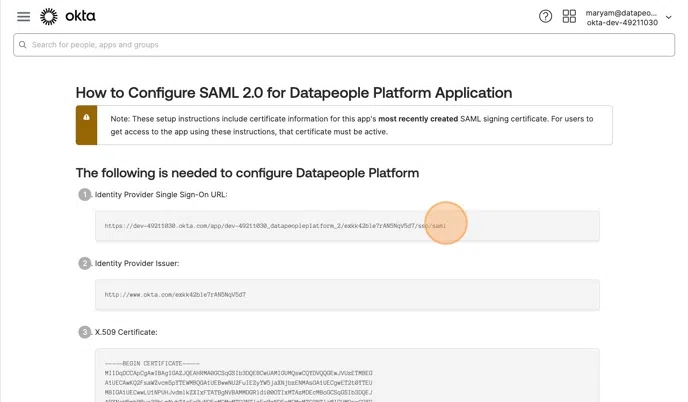
12. Copy the Identity Provider Single Sign-On URL from Okta's SAML setup instructions page to the SAML Location URL field in the Datapeople SSO form.

12. Copy the Identity Provider Issuer from Okta's SAML setup instructions page to the Entity ID field in the Datapeople SSO form.
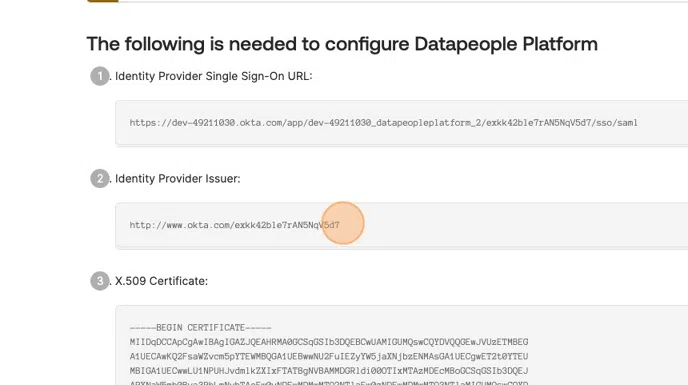
13. Copy the Identity Provider Single Sign-On URL from Okta's SAML setup instructions page to the SAML Location URL field in the Datapeople SSO form.
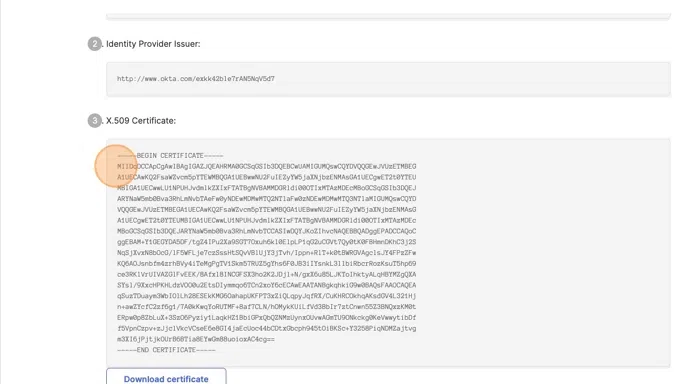
14. Copy the X.509 Certificate from the Okta's SAML setup instructions page into the Certificate field in the Datapeople SSO form.
Make sure to only include the certificate contents, not the headers that say "Begin Certificate" and "End Certificate".
Test Configuration and Make SSO Mandatory
15. After adding the user group and ensuring you are in it, click Test Configuration. This will redirect you to authenticate with your SSO provider to confirm the connection is working.
This button will not appear until you submit your IdP Metadata details.
16. You should automatically get redirected to the Okta authentication page where you need to sign in with your corporate email account. If you are successful, you will be returned back to the Settings page where the SSO Tested status will be completed.
17. Once you successfully test an SSO login using the Test Configuration button, you will see a new option in the Datapeople SSO page that is Enable Mandatory SSO.
Toggle the button to "Enabled" so that Datapeople will automatically redirect users to your SSO provider to log in if anyone tries to sign in to Datapeople with an email listed on your SSO Setup page (those that are associated with your organization).
