
Getting Started with JobNav Anywhere
Your step-by-step guide to writing and optimizing job content - right where you work.
Step 1: Set Up the Extension
- Install the JobNav Anywhere browser extension
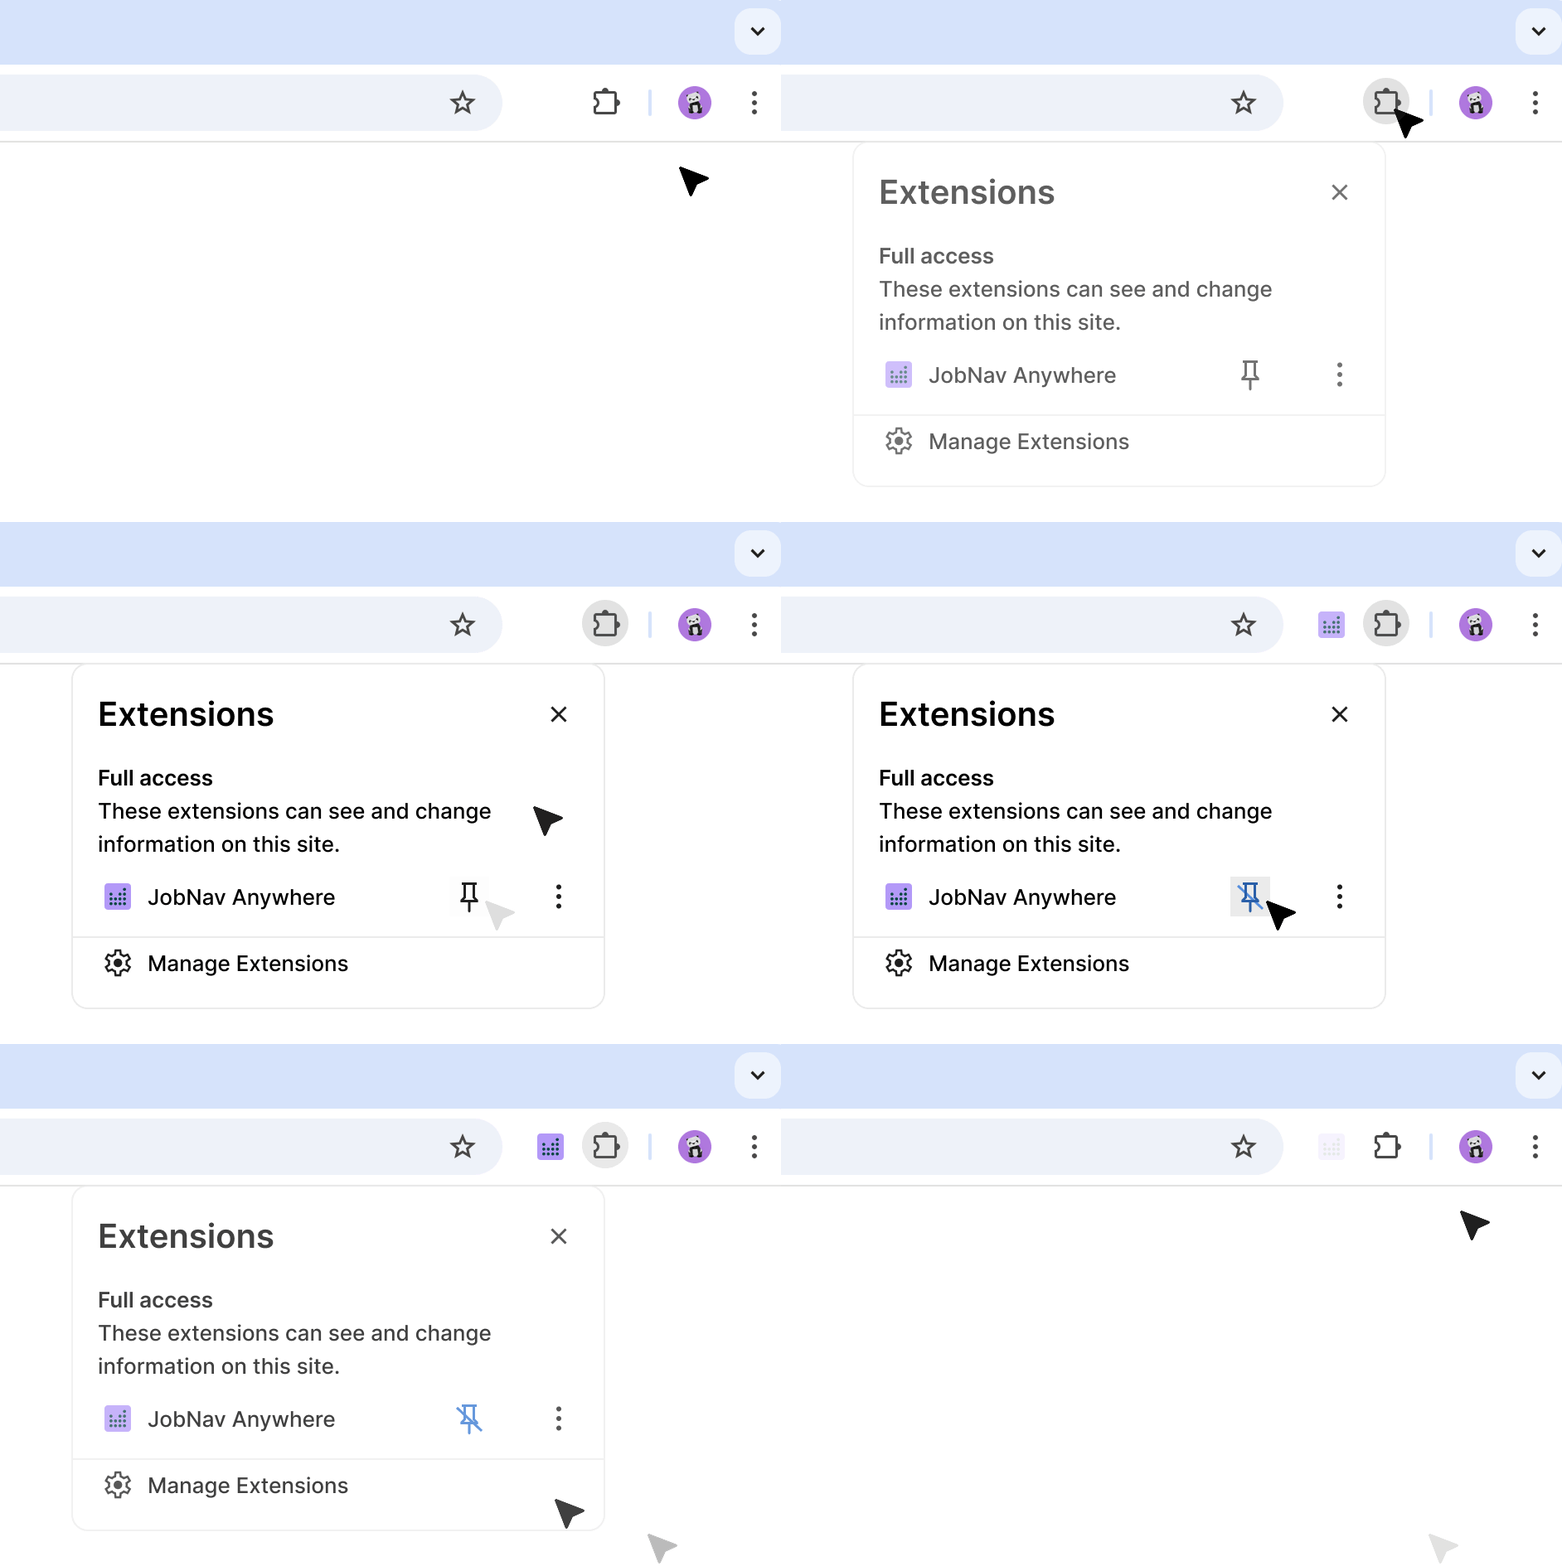
- Pin it for easy access:
- Click the puzzle piece icon (Extensions) in your browser toolbar.
- Find JobNav Anywhere in the list.
- Click the pin icon to keep it visible on your toolbar.
Now, you're ready to launch the extension anytime with just one click
Step 2: Explore the Side Panel
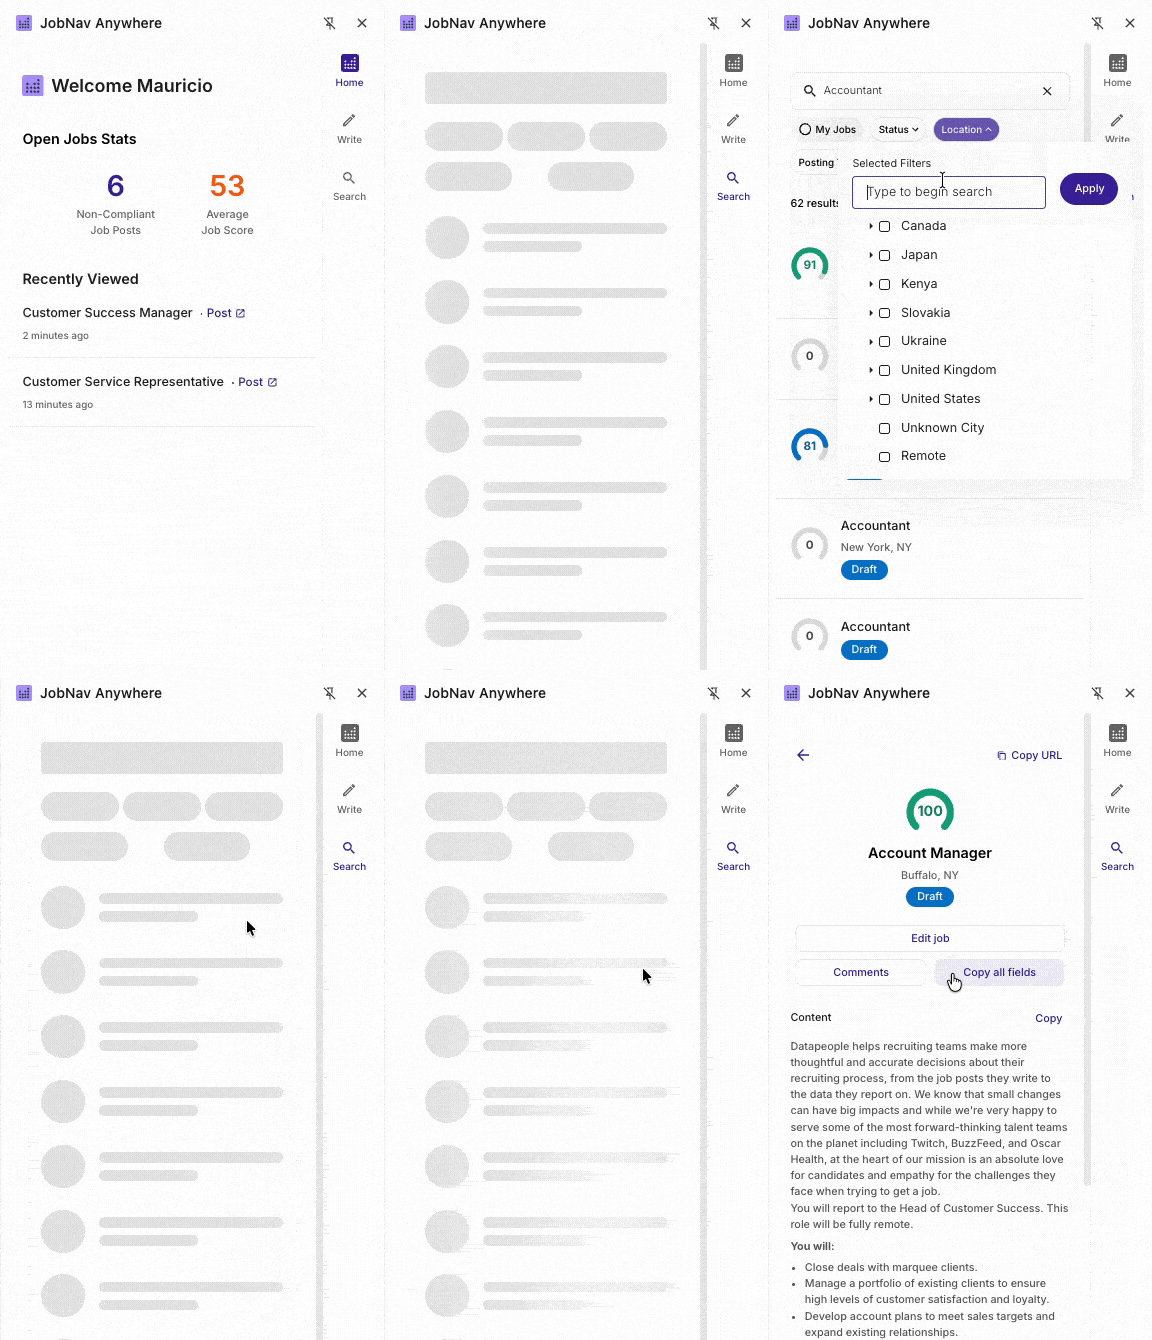
Click the JobNav Anywhere icon to launch the extension. You’ll see a side panel - this is your control center
Here’s how to use it:
- View recent jobs you’ve worked on
- Search your job content library
- Start from scratch and write a new job post

Step 3: Use the Job Content Library
Your content library is a goldmine of reusable job posts: drafts, published jobs, and unpublished jobs.
Here's how to use it:
- Access your library with the search tab on the side panel
- Search by job title or requisition number
- Use filters to narrow your results
- Sort by score to find your highest-performing content
Step 4: Reuse Job Content in Your ATS
Save time by pulling in job content you’ve already created.
- Navigate to your open req in your ATS.
- In JobNav Anywhere, search for the content you need in the library.
- Search by title or req number
- Filter by published status, location, posting type or employment type
- Sort by score to find top-performing versions.
- Click import. JobNav automatically populates the supported ATS job fields for you.
Just like that, your content is in place! ✨
Step 5: Edit or Customize Content
Want to tweak the job description? No problem.
- Click Edit This Job from the side panel.
- A new window opens with the JobNav Recruiter Smart Editor.
- In the editor, you can:
- Apply templates to update boilerplate language
- Collaborate with teammates via comments
- Make any edits needed
Once you're done, hit Save and Close and your updates instantly appear in your ATS.
Step 6: Write a Job Post from Scratch
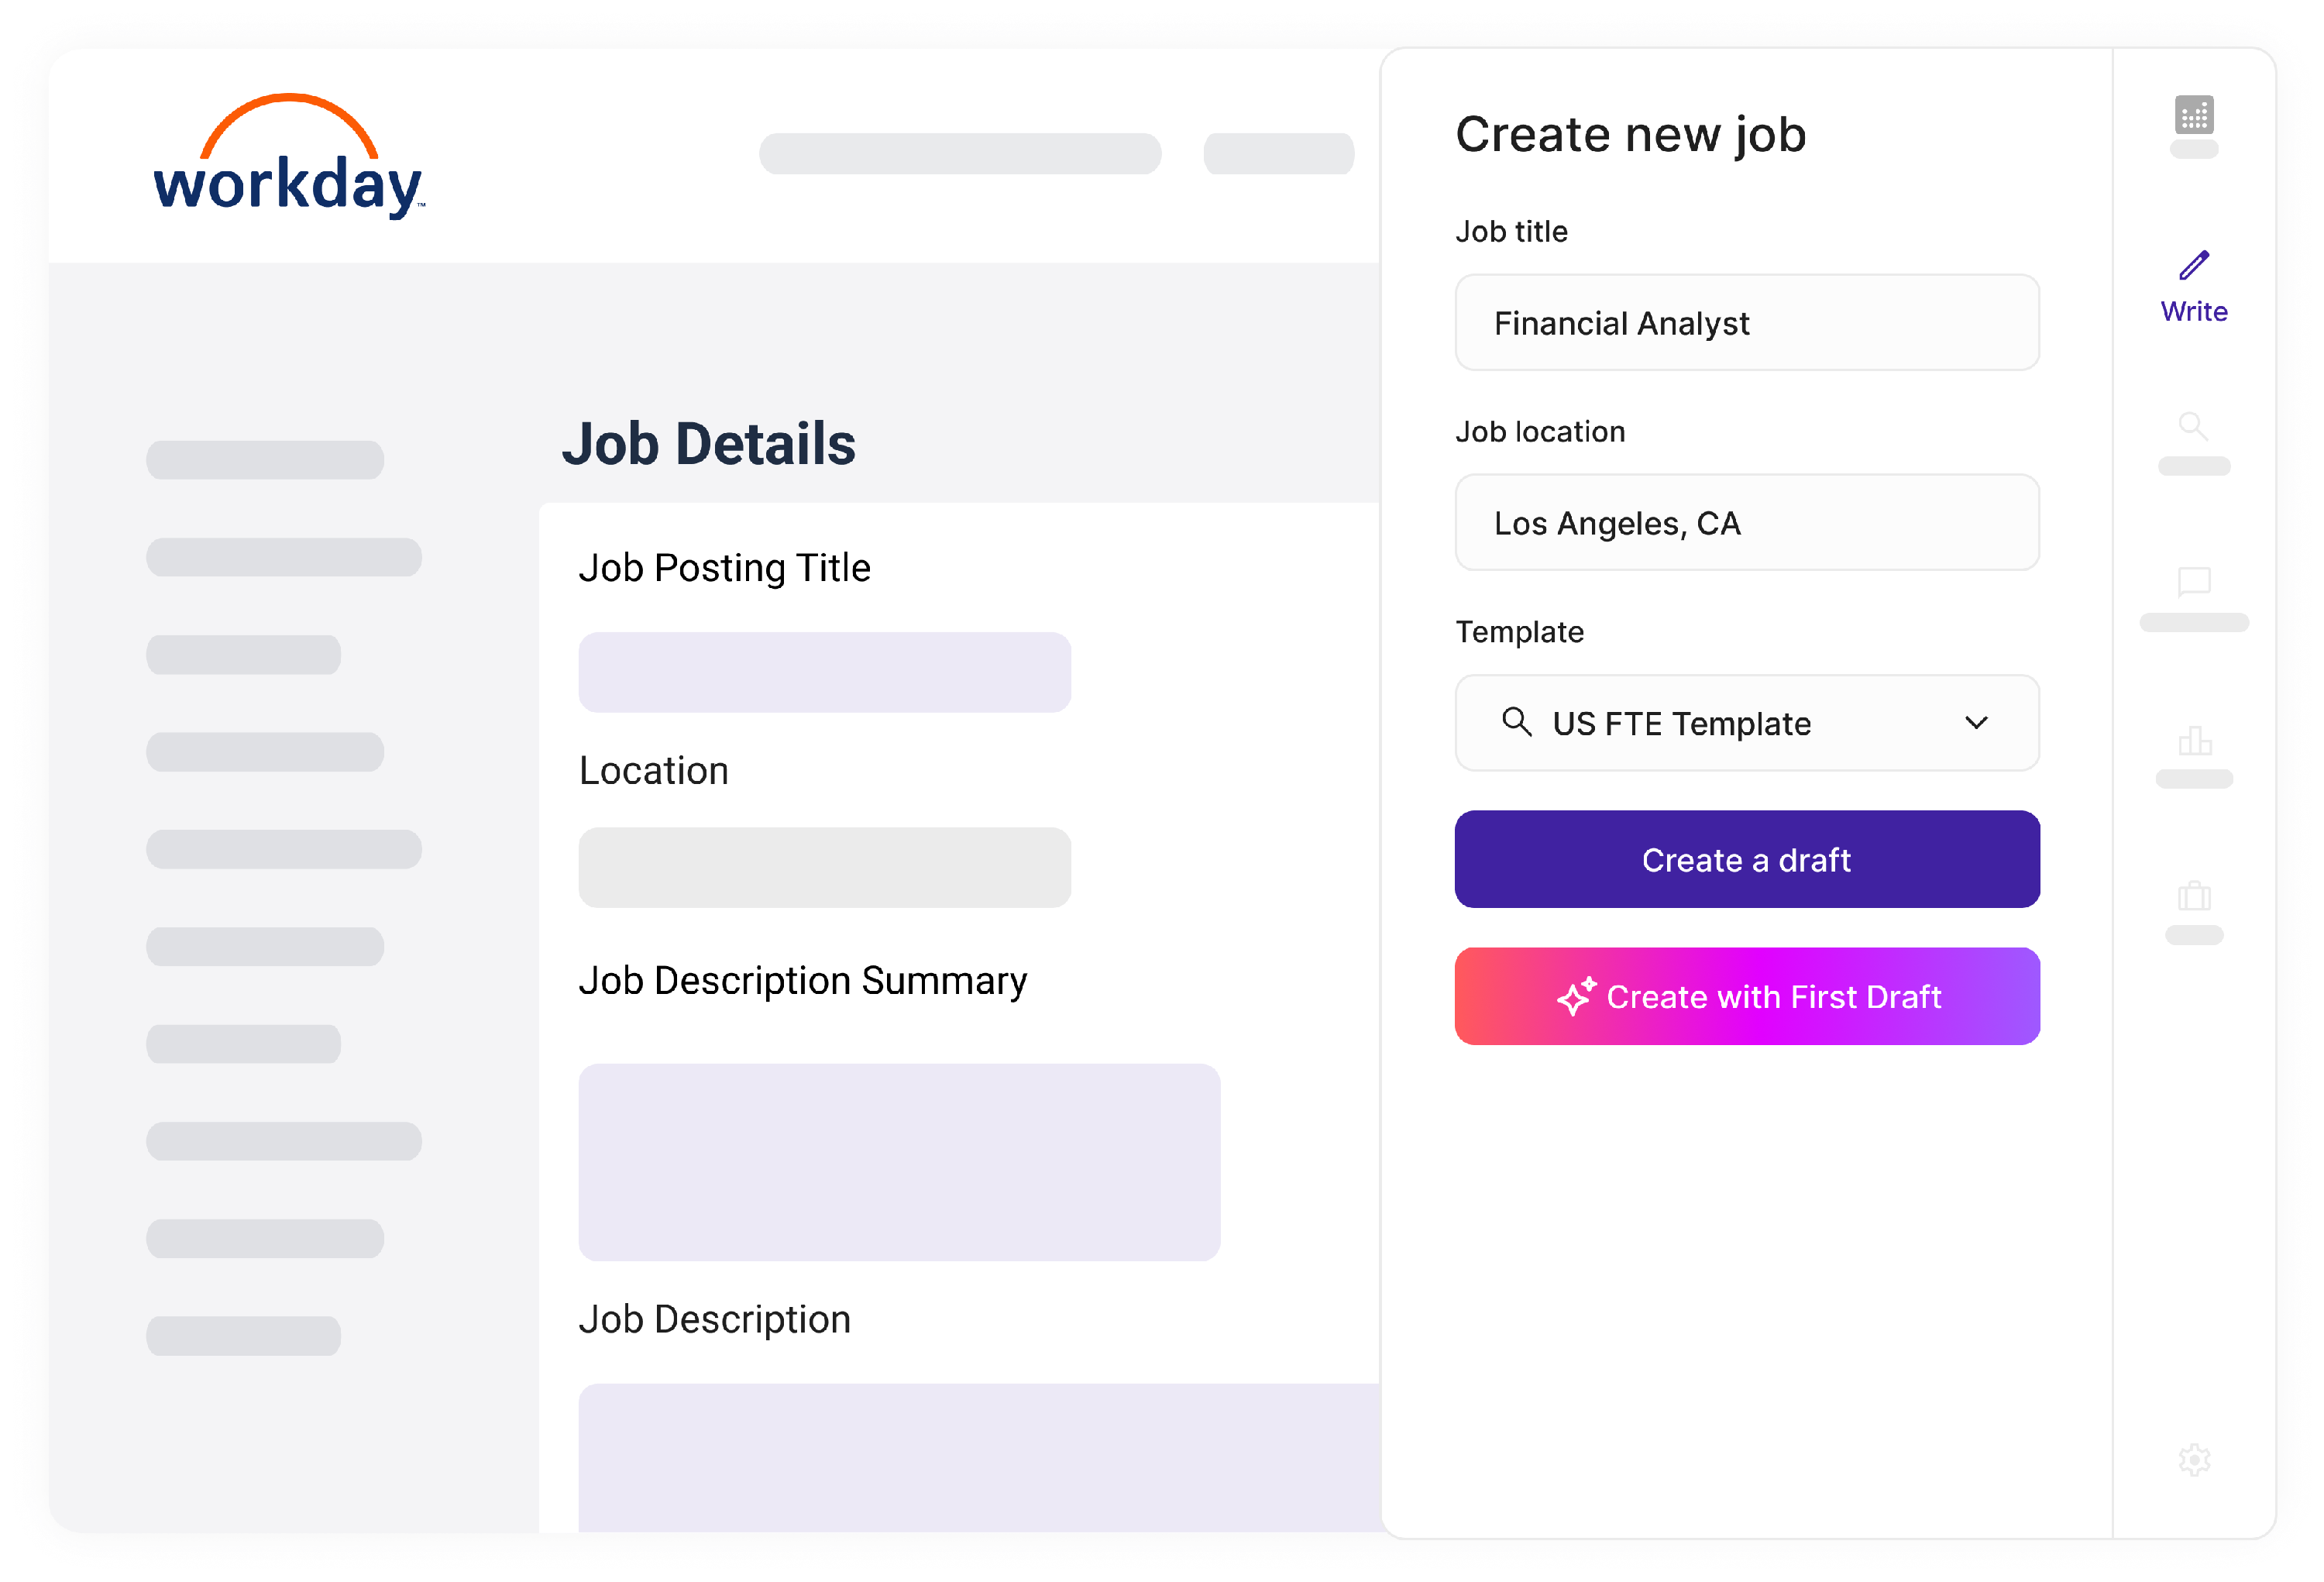
If you do not have any existing content, you can start fresh directly from your ATS.
- Go to your job setup page in your ATS (name may vary).
- In the side panel, click Write.
- Enter your job details.
- Choose an approved template
- Click Write New Draft.
The Smart Editor opens in a new window. Once you're finished, click Save and Close and your content is automatically imported into your supported ATS fields.
Step 7: Grab Job Content for Other Tools
Need to use job content outside of your ATS? Easy!
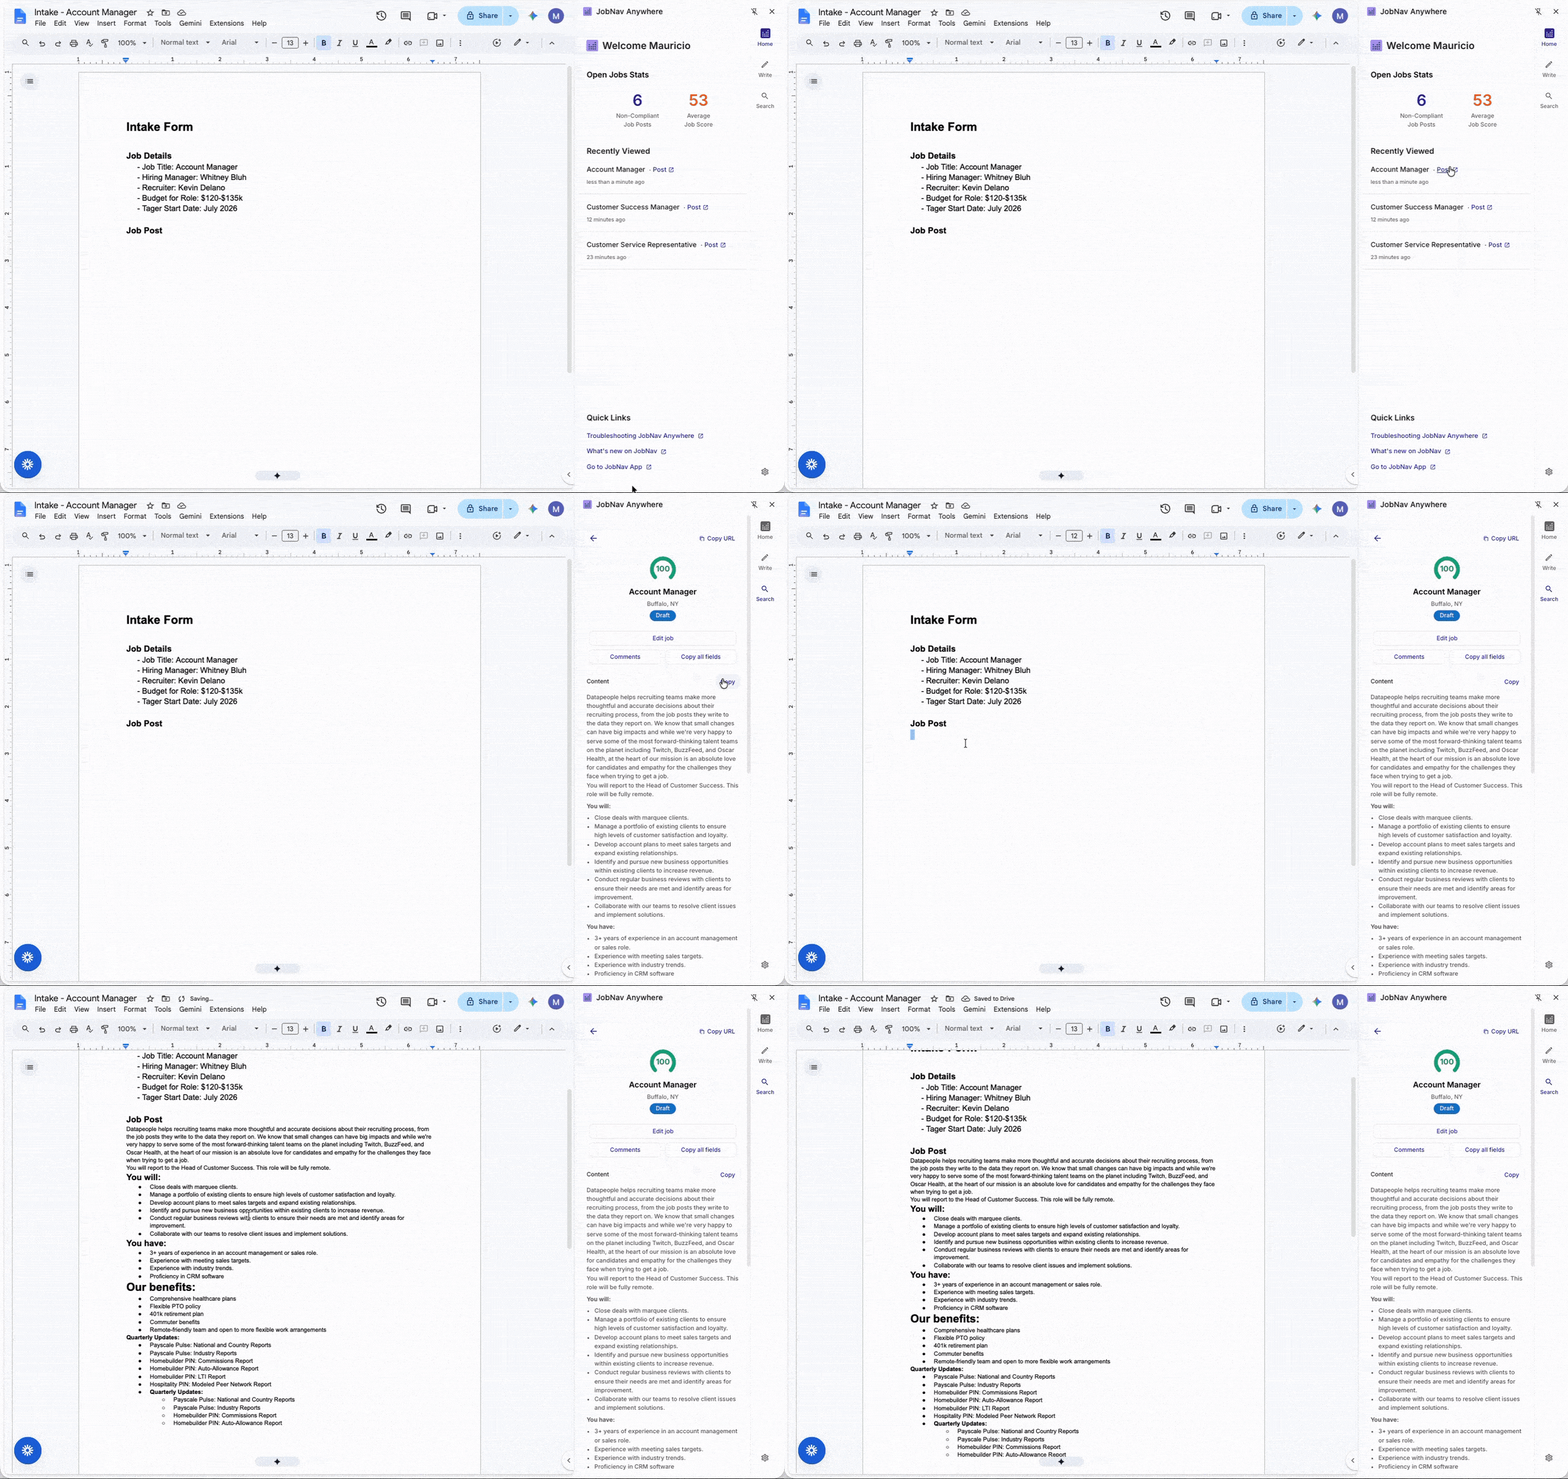
- Open the JobNav Anywhere extension.
- Search your library and find the job draft.
- Copy the fields you need and paste them wherever you want including Slack, Google Docs, Notion, etc.
You're All Set!
With JobNav Anywhere, you have everything you need to:
- Reuse high-scoring job content
- Write and edit content
- Collaborate with your team
- Work directly within your existing workflow
Have questions or need support? Reach out to your JobNav Customer Success Manager.